Recording a software instrument in Ableton Live

Hi, I'm Mihai Chereji, from Cluj, Romania.
This lesson is for week 2 of Introduction To Music Production at Coursera.org. This week we'll be learning the (very simple) process of creating a software instrument, playing it and quantizing works in Ableton Live 9.
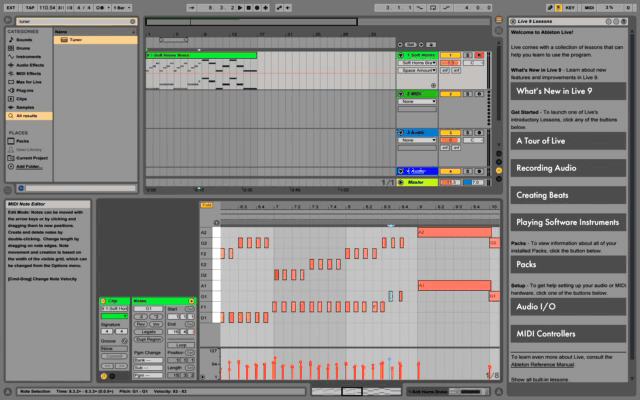
The default Ableton Live Set opens with 2 MIDI tracks, 2 Audio tracks and 2 send tracks.
There's more than one way of adding an instrument to the Live Set:
- If you have an empty MIDI track, just select it (by clicking it's header), selecting the instrument from the Sounds, Drums, Instruments, Max for Live devices, or Plugins that you have installed and double click it. The instrument will be added to your selected MIDI track.
- If you don't have a selected track, double clicking the instrument will add a new track ready with that instrument.
- Dragging the instrument from the sidebar will have the same effect.
- If you press the shortcut Q when you have an instrument selected, you can quickly swap between instruments, right while playing.
Anyway you choose to do this, Live will automatically change the track name to the name of the instrument and arm it for recording. (as you can see from the screencap below)
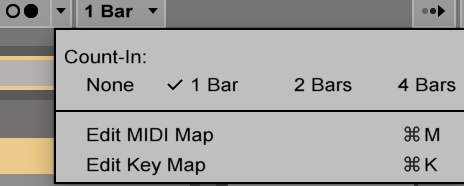
Now that you have selected an instrument (I settled on a really nice Soft Horns sound from Live), it's time to record. Just make sure you have your count-in set up for you (as in the screenshot), and that your tempo is right for the segment you're about to play.
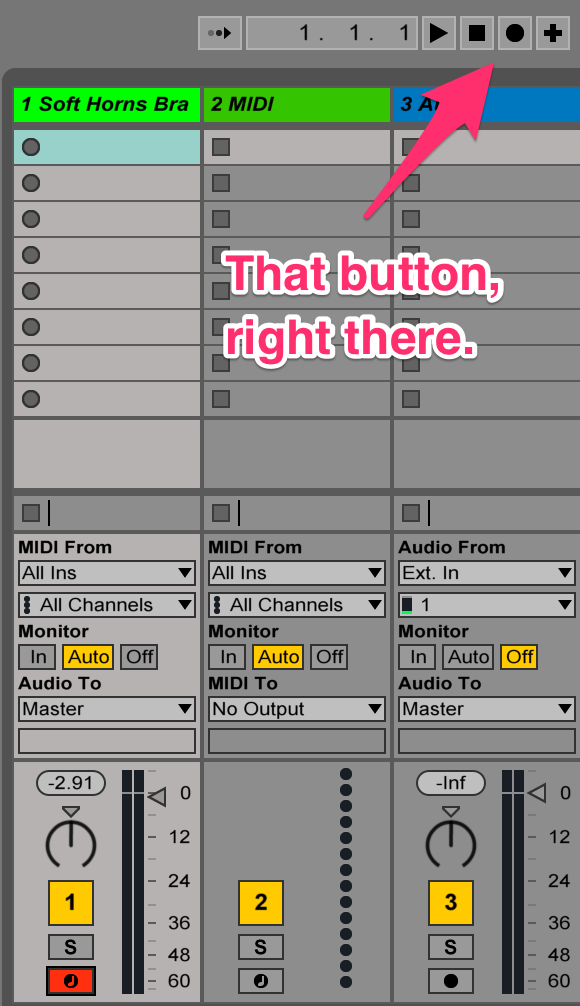
And it's time to hit record.
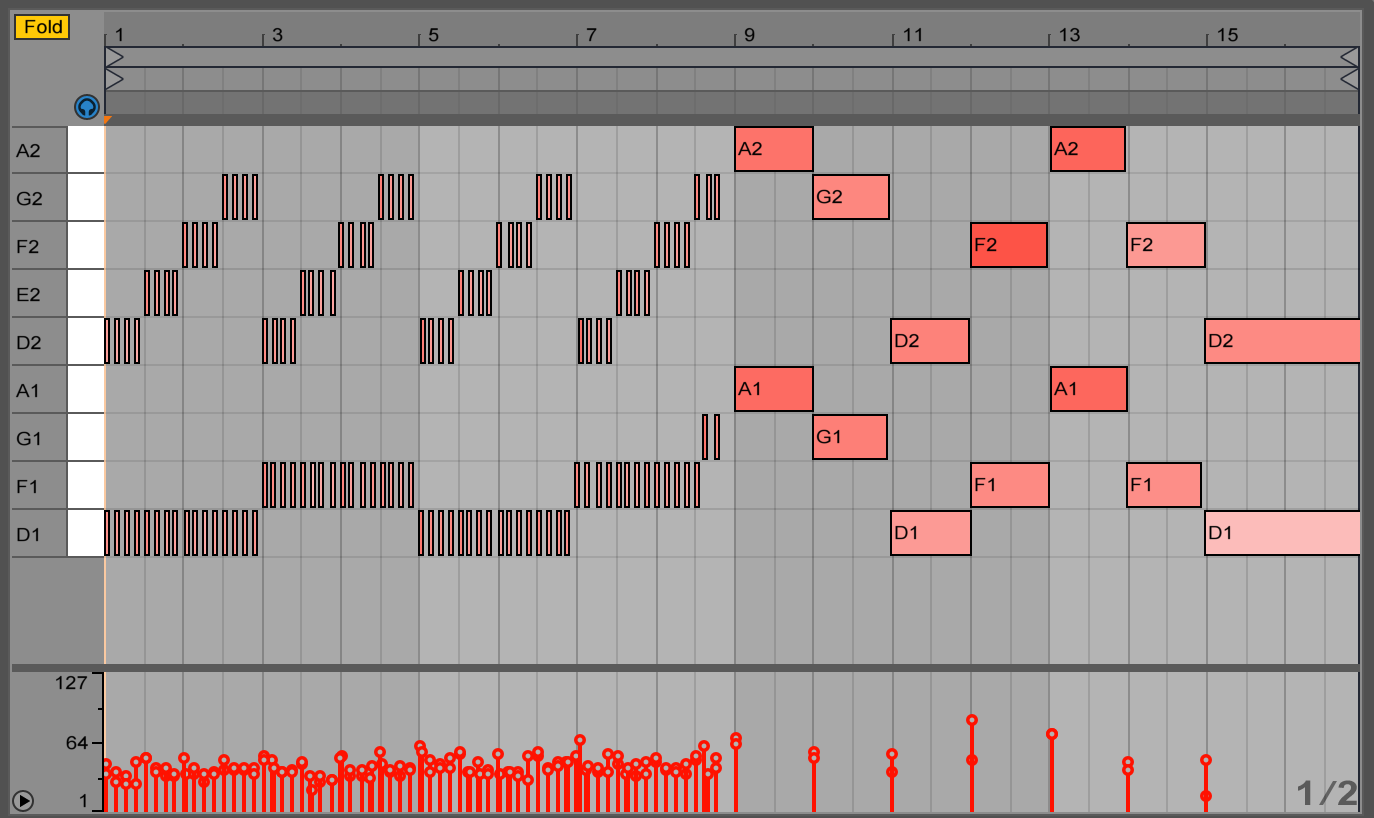
This is what the MIDI looks like after I first recorded it.
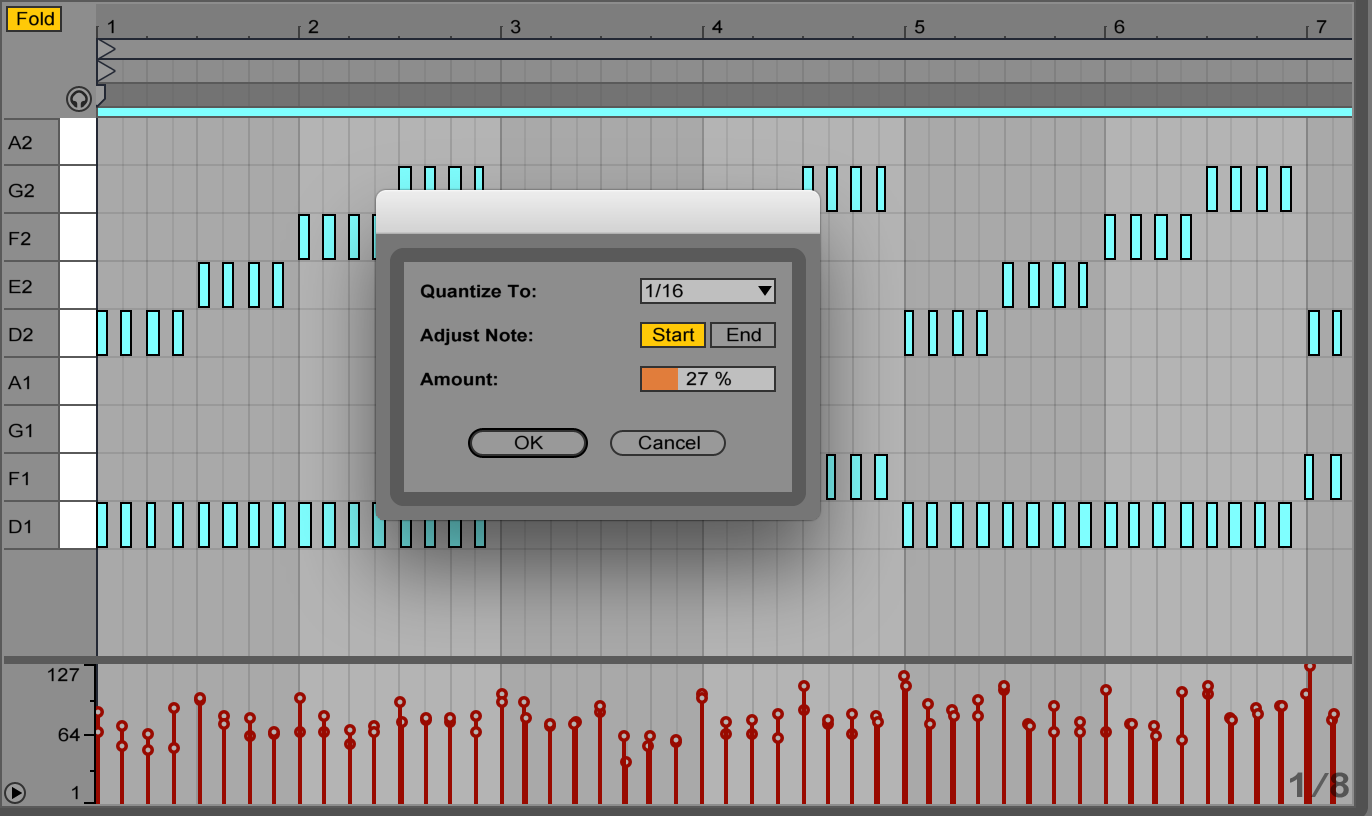
It's time to clean up some extra notes, equalize the velocities, and then quantize, so we have a cleaner performance than a bad piano player like me can achieve.
There are a few notes that I have to change (I accidentally played the bass note higher than I should have and missed the last beat). This is really easy to do.
After that, you quantize the notes (though not at 100% to keep a bit of human error/emotion in there). To access the quantization menu quickly in Live, the shortcut is Command+Shift+U. Remember it. Also remember to quantize based on the shortest notes you've played, or the error you're trying to correct (in my case, I played 1/16th notes, so that's what I'll quantize to).
and tweak the velocity as needed.
You can also MIDI overdub what you've recorded, which becomes extremely useful when you want to play more complex parts. To do so, just click the Plus button next to the record button.
Pretty much that's it when it comes to recording MIDI in Ableton Live (largely speaking, of course.) Other tips that might help you out:
- If your MIDI controller has play/stop/record buttons, USE THEM. They become way easier to use, especially if you'll be using that controller for recording as well. Especially useful is the fact that Live allows you to map any MIDI signal to any control in the interface (the same is true with computer keys as well). Just press Command+M to start editing, select a control and then send a MIDI signal (even notes!) to match them.
- Double tap the stop button to move the play/record cursor to the beginning of the track. So an easy way to re-record a passage you're not satisfied with is double-tap the stop button and then tap the record button on your controller.
- If you don't have a midi controller, you can use your computer's keyboard to record MIDI in Ableton. Less than ideal, but it's way better than nothing.
Just for comparison, here's what I recorded before quantization, adjusting volumes, correcting notes, and overdubbing:
And after: