Basic automation in Ableton Live 9

Hi, I'm Mihai Chereji, from Cluj, Romania.
This lesson is for week 3 of Introduction To Music Production at Coursera.org. This week we'll be learning how to automate parameters in Ableton Live 9.
We'll continue working on the track I started for week 2.
Here's how the audio sounded last time we visited it:
Automation in music production refers to automatically moving faders at certain times.
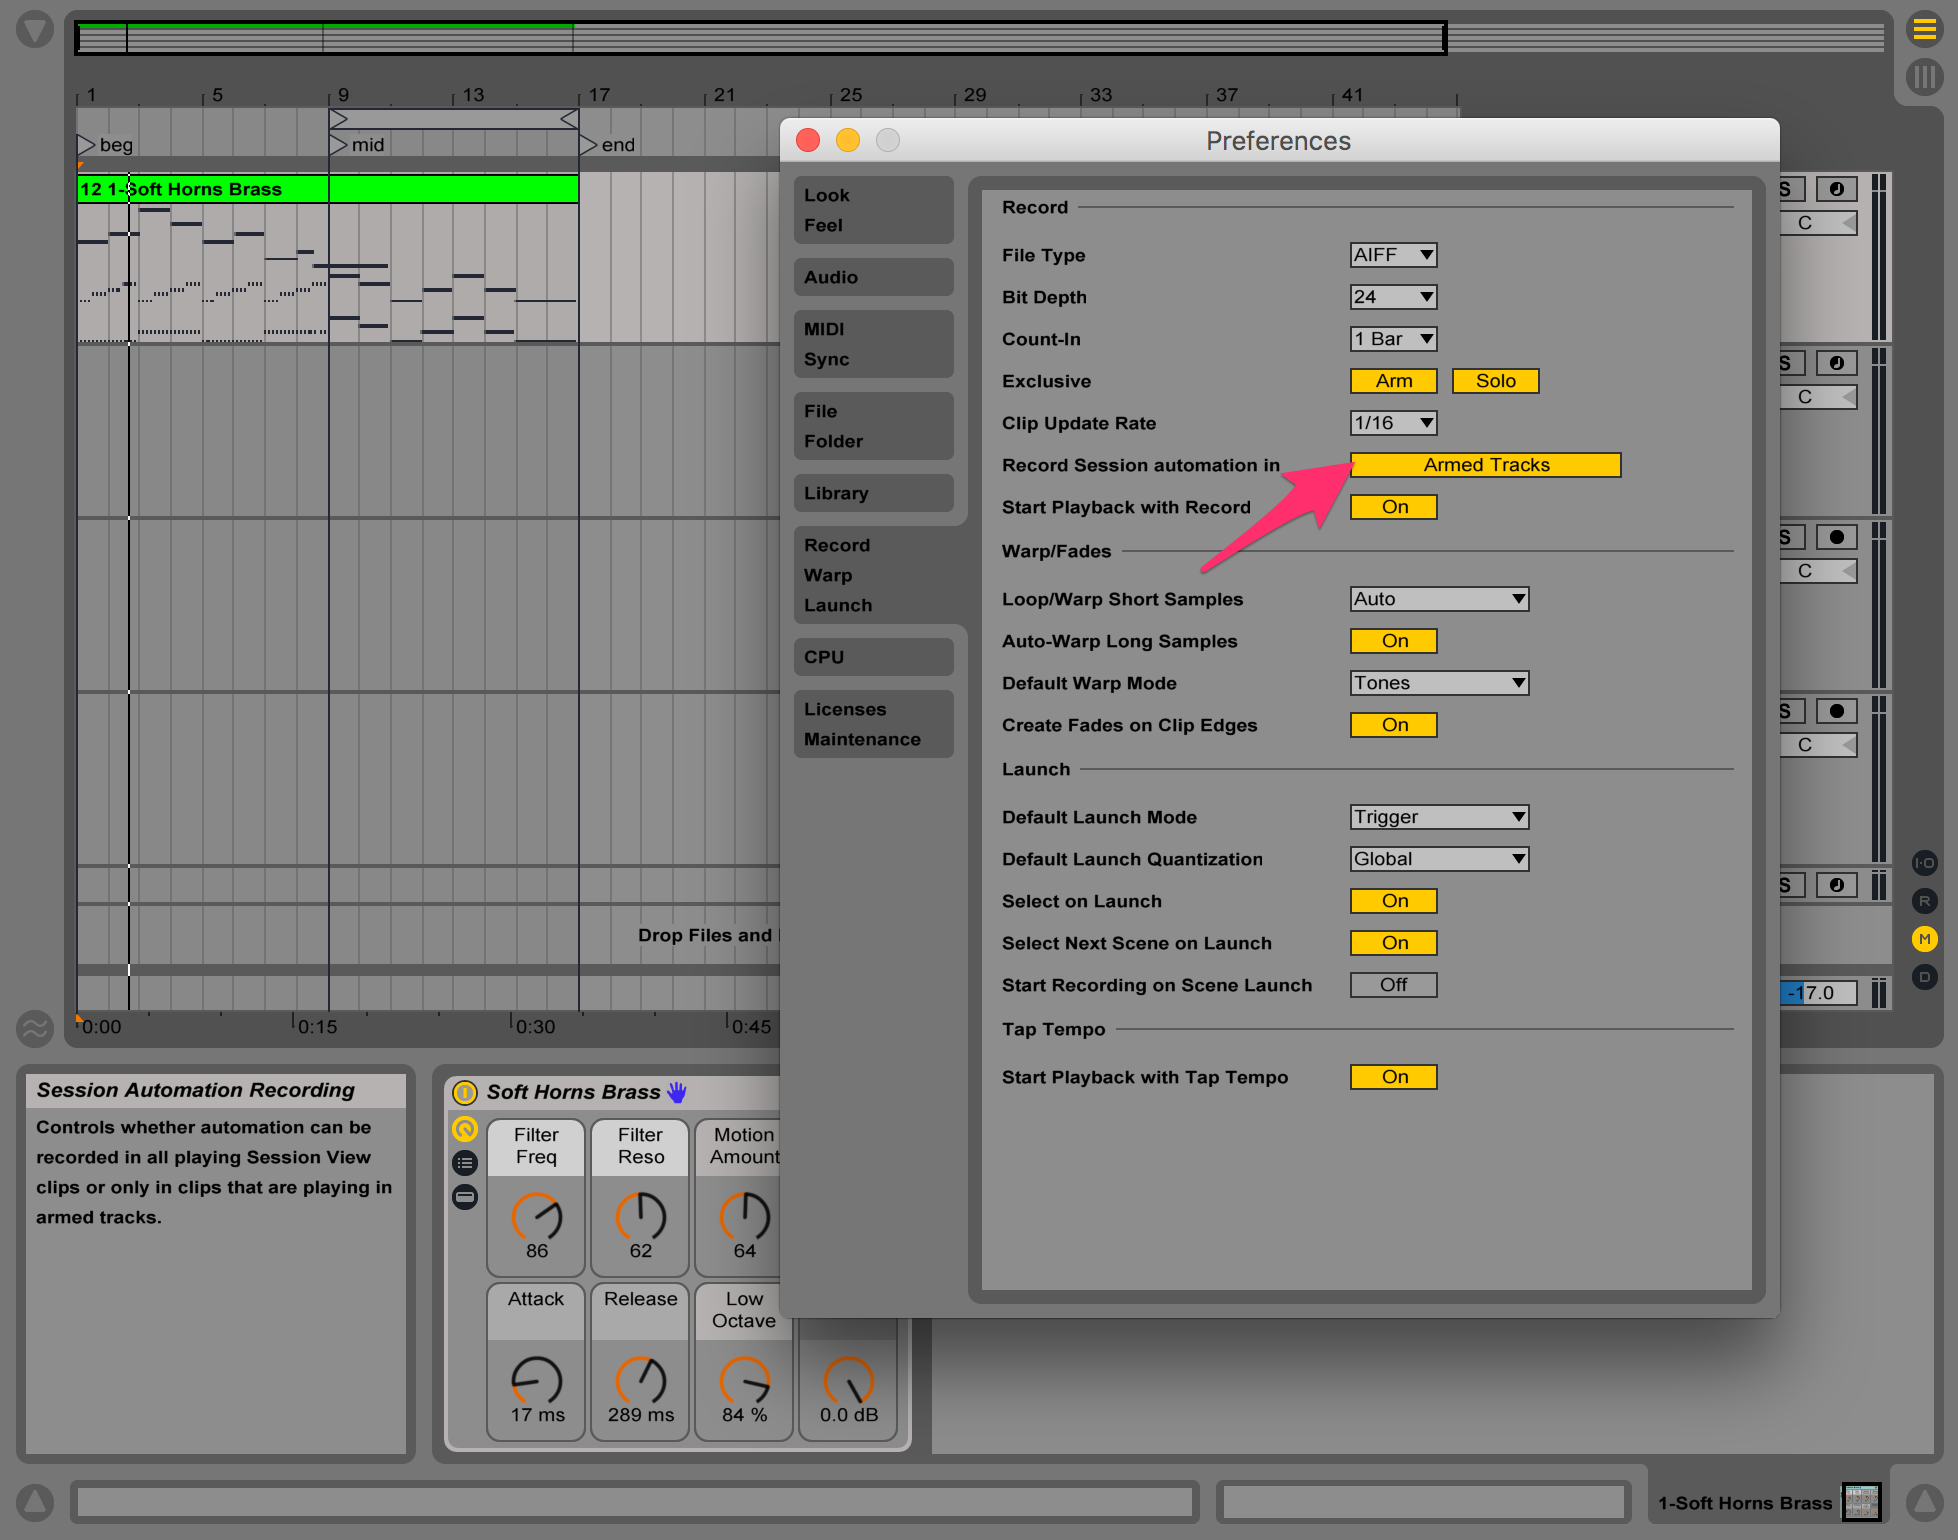
In Ableton Live, we have a global option that allows us to (by default) automate armed (for recording) tracks or in all playing tracks.
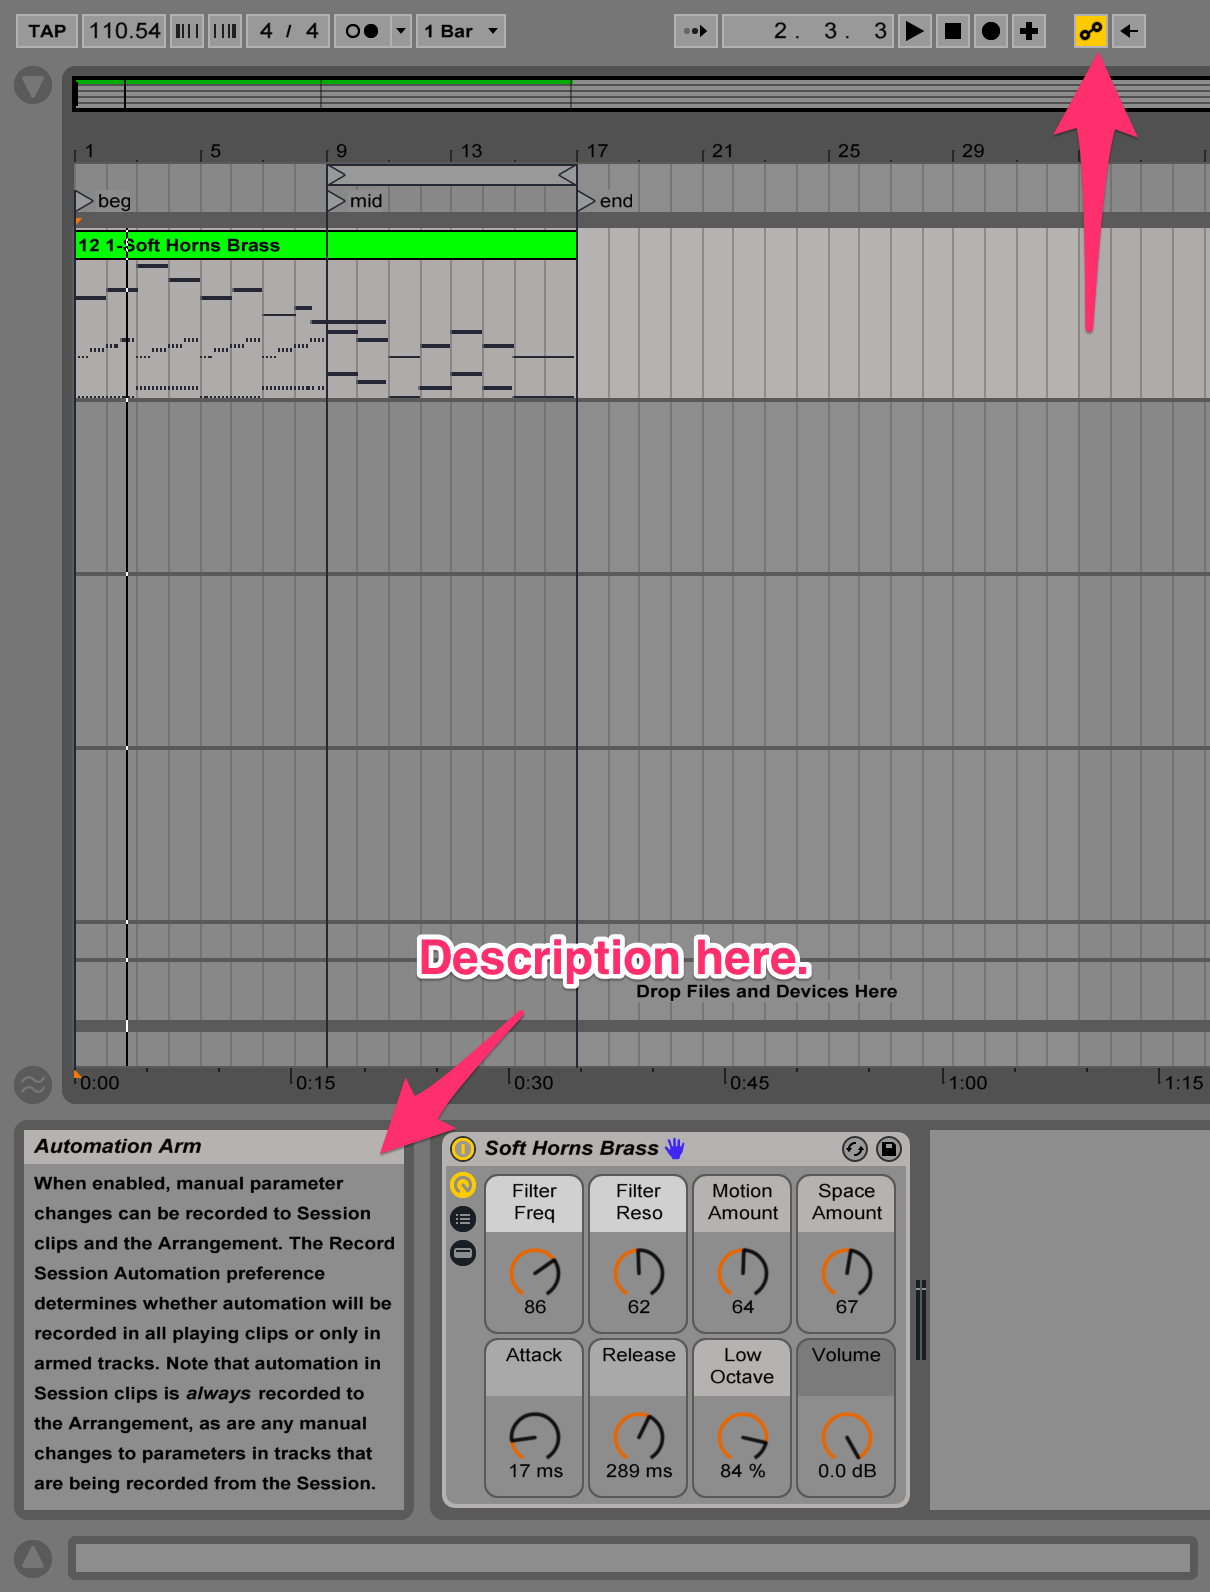
But you can bypass that with the Automation Arm button, that allows you to quickly toggle the same parameter.
For any given track, you can observe multiple faders at the same time, using the tiny plus on the right side of the track, or by right clicking on a parameter and selecting "Show automation in new lane".
Below you'll see a screencap of automating several parameters:
Steps to follow:
- Arm automation if you want to automate tracks you are not recording.
- Expand all the parameters you want to automate (note: you can observe that modifying a parameter during recording will put that parameter curve over the MIDI/audio view)
- Correct any curves that might not be perfect.
You can also manually create points (or curves) without recording, by creating manual breakpoints:
You can of course map any CC faders or knobs to any parameter in Ableton and live record using that (as I've said last week, you can do that by pressing Cmd+M and start assigning CCs to different parameters.), but I used the mouse to make it easier to see what is happening.
That's about it. Again, for reference, here's how the track sounds after automation: (I know it's no improvement by any sense of the word, but it shows how the parameters have all changed :) )